Engineered wood flooring is an alternative to solid hardwood flooring made entirely out of real wood.  It’s currently the most popular type of flooring in the world.  North America is the only area left where traditional, solid wood floors still outnumber engineered floors, but engineered wood flooring is quickly catching up, with the rate of use for new builds, as well as remodels, increasing steadily every year for the past few decades.  Inspectors and homeowners alike may be interested in how this product is manufactured and installed, and what its advantages are compared to older, more traditional forms of flooring.
schedule

Brief History

The beginnings of mass-produced wood flooring can be dated as far back as 1903, when an E. L. Roberts mail-order catalog offered “wood carpeting.”  This flooring consisted of 1½ x 5/16-inch wooden strips that were glued to heavy canvas that was then installed by tacking it down with brads.  The wood was then sanded and finished.  The varnishes used were usually slow-curing tung oils from China.  These were not durable in themselves, so the floors were hot-waxed and buffed to a shine with a floor brush.

Early examples of the “wood carpet” eventually evolved into more modern iterations, such as laminate flooring, which consists of melamine-infused paper as its upper layer, and wood-chip composite beneath.  Laminate flooring typically features a printed or embossed top layer meant to approximate the look of real hardwood.

The current incarnation of engineered wood flooring has been available since the 1960s, and has steadily increased in quality, leading to improved advantages over traditional hardwood flooring.

Composition

Engineered wood flooring is most commonly made with a plywood-core substrate and a real hardwood veneer or skin, which comes pre-finished from the factory.  The top veneer, which looks just like the top of a traditional solid wood plank, is called the lamella.engineeredwood

Some engineered flooring utilizes a finger-core construction, with a substrate comprised of small pieces of milled timber running perpendicular to the lamella.  This can be made with an additional layer of plywood running parallel to the lamella, which gives it added stability.  Fiberboard-core flooring is also available, but it’s generally considered to be an inferior option.

Engineered wood flooring is meant to be indistinguishable from traditional hardwood floor once it’s installed, and only the lamella is visible.  The lamella veneers available are made from nearly every type of common wood, as well as many more exotic ones, in order to provide the same variety of aesthetics typical of quality hardwood floors.  The substrate that the veneer is attached to is just as strong and durable as hardwood — if not stronger — and the finish applied at the factory often outlasts one applied on-site to solid wood flooring.  Even surface effects are available that can be applied to the finish to give the flooring a time-worn look, such as light distressing.

Engineered flooring runs the gamut from the low end, starting at $3 per square foot, to the high, at $14 and more. To judge quality, check the thickness of the lamella, the number of layers in the substrate, and the number of finish coats.  Typically, the more layers, the better. Listed below are descriptions of the advantages of adding layers to the construction in the common classes of engineered boards:

  • 3-ply construction: 1- to 2-mm wear layer; five finish coats; 10- to 15-year warranty; 1⁄4-inch thick; current price is about $3 to $5 per square foot.  Options for lamella veneer are limited to common species, such as oak and ash, and just a few stains are available;
  • 5-ply construction: 2- to 3-mm wear layer; seven finish coats; 15- to 25-year warranty; 1⁄4-inch thick; about $6 to $9 per square foot.  More species, such as cherry, beech, and some exotics are available for lamella, as well as all stains, and a few surface effects, such as distressing; and
  • 7-ply or more: 3+-mm wear layer, which can be sanded two or more times; nine finish coats; 25+-year warranty; 5/8- to 3⁄4-inch thick; average price is about $10 to $14 per square foot.  The widest selection of species is available for lamella, including reclaimed options.  More surface treatments are also available, such as hand-scraped and wire-brushed.

The cost of engineered flooring can be around 20% more than that of traditional flooring, but the difference can be offset or recouped by saving on installation, staining and sealing.

Installation

Installation of engineered wood flooring is generally quite simple compared to the installation of traditional hardwood, and can often be accomplished by a homeowner without the help of a professional flooring contractor.  If the services of a professional are enlisted, the job can be done more quickly and cost-effectively than if solid hardwood were to be installed.  Engineered flooring can be fastened in place with screws or nails, glued down, or left to “float,” relying on its mass to hold it in place.  Listed below are several installation methods:

  • A bead of glue can be applied to the tongue of each board, which is then tapped into place with a block. The floor floats, unattached to the sub-floor except by force of gravity.
  • A floor stapler and compressor can be used to rapidly secure the boards to the existing floor, without having to deal with any glue.
  • Boards can be laid in a bed of adhesive, as is done with tile.  This approach works particularly well over cured concrete, which precludes the use of staples.
  • Some types of engineered floor are designed with milled tongues and grooves that lock together without glue or fasteners. It’s the quickest and cleanest installation method.

Advantages of Engineered Flooring

While solid hardwood is a great traditional building material that provides aesthetically pleasing and structurally sound flooring, it does have its limitations.  For example, it cannot be installed directly on concrete or below grade, such as in basements.  It is generally limited in plank width and is more prone to gapping, which is excessive space between planks, and cupping, which is a concave or “dished” appearance of the plank, with the height of the plank along its longer edges being higher than the center with increased plank size.  Solid hardwood also cannot be used where radiant-floor heating is in place.
Engineered wood flooring, on the other hand, can actually provide some distinct advantages over traditional hardwood in many instances and applications.  Some of these include:
  • Lamella veneer is available in dozens of wood species.
  • Surface effects can be applied to further enhance its appearance.
  • The factory finish can outlast site-applied finish on solid hardwoods.
  • Drying time for the finish is eliminated because it’s pre-applied at the factory.
  • It can be used in basements and over concrete slabs.
  • Installation is quick and easy.
  • It can be used over radiant-heat systems.
  • It can be refinished to repair normal wear and tear.
  • The core layer can expand and contract more freely without warping.
  • The flooring can be removed and re-installed elsewhere, if desired.
Engineered wood flooring is increasingly the first choice for floor installations, and its advantages, in many circumstances, can be exceptional.  Homeowners with a little DIY experience can usually install it themselves.  Inspectors are likely to encounter it in new builds as well as remodels even more frequently as it continues to gain in popularity every year.

From Engineered Wood Flooring – InterNACHI http://www.nachi.org/engineered-wood-flooring.htm#ixzz30Ha3zpjC

Efflorescence is the white chalky powder that you might find on the surface of a concrete or brick wall. It can be a cosmetic issue, or it can be an indication of moisture intrusion that could lead to major structural and indoor air qualityefflorescence-signature-home-inspection issues. A home inspector should understand what efflorescence is in order to recognize potential moisture problems.

Indications of Moisture

Efflorescence is the dissolved salts deposited on the surface of a material (such as concrete or brick) that are visible after the evaporation of the water in which it was transported. The moisture that creates efflorescence often comes from groundwater, but rainwater can also be the source. Efflorescence alone does not pose a major problem, but it can be an indication of moisture intrusion.

Porous Building Materials

Building materials, such as concrete, wood, brick and stone, are porous materials. Porous materials can absorb or wick water by a process called the capillary action. As water moves through the porous material, salts can be drawn with it.

Concrete, wood, brick, stone and mortar are porous materials that contain salts. The ground in which these materials can come into contact also contain salts. Capillary action can literally suck water and transport it through porous building materials.

Capillary Action

Porous building materials are capable of wicking water for large distances due to capillary action with a theoretical limit of capillary rise of about 6 miles. That’s 6 miles directly up. Think of a tree and how a tree can transport water from its roots to its leaves. That’s capillary action. And it’s very powerful. When you add salt to that capillary process, it can be destructive.

Salts dissolved by groundwater can be transported by capillary action through porous soil. Building materials in contact with soil will naturally wick the water inward and upward. Take concrete footings — they are typically poured directly onto soil without any capillary break. Sometimes this is called rising damp. This is the beginning of how water can wick upward into a structure.

Destructive Pressuressignature-home-inspection-efflorescence

When the capillary flow of water reaches the surface of a building material, evaporation occurs. As the water evaporates, salt is left behind. As this evaporation of capillary flow continues, the salt concentration increases, which creates an imbalance, and nature abhors imbalance and always wants to put things back into equilibrium. This is process is called osmosis. To re-establish equilibrium through osmosis, water rushes toward the salt deposit to dilute the concentration. This rush of water creates massive hydrostatic pressures within the porous material, and these pressures are destructive.

The pressure from osmosis can create incredibly strong hydrostatic pressure that can exceed the strength of building materials, including concrete.

Here are some examples of how that pressure translates:
  • Diffusion vapor pressure: 0.3 to 0.5 psi
  • Capillary pressure: 300 to 500 psi
  • Osmotic pressure: 3,000 to 5,000 psi

As you can see from the list above, osmosis can create pressure that is greater than the structural strength of concrete, which can be from 2,000 psi to 3,000 psi. The action of water rushing to the surface due to capillary action creates incredible forces that can cause materials to crack, flake and break apart.

Spalling

When efflorescence leads to strong osmotic pressures—greater than the strength of the building material—and the material literally breaks apart, the resulting damage is called spalling. Hydrostatic pressure can cause spalling, but spalling can also be caused by freeze-thaw cycles in building materials that have a high moisture content.

Both efflorescence and spalling can be prevented with capillary breaks, such as by installing a polyethylene sheeting under a concrete slab.

Identifying Efflorescence

InterNACHI inspectors should already know how to distinguish mold from efflorescence (at right), but it is possible for homeowners to confuse the two. The expense of a mold test can be avoided if the substance in question can be identified as efflorescence.
Here are a few tips that inspectors can offer their clients so that they understand the differences:
  • Pinched between the fingers, efflorescence will turn into a powder, while mold will not.
  • Efflorescence forms on inorganic building materials, while mold forms on organic substances. However, it is possible for mold to consume dirt on brick or cement.
  • Efflorescence will dissolve in water, while mold will not.
  • Efflorescence is almost always white, yellow or brown, while mold can be any color imaginable. If the substance in question is purple, pink or black, it is not efflorescence.
Aside from mold, the following conditions can result from excess moisture in a residence:
  • fungi that rot wood;
  • water damage to sheetrock;
  • reduced effectiveness of insulation.
Inspectors should note the presence of efflorescence in their inspection reports because it generally occurs where there is excess moisture, a condition that also encourages the growth of mold.
Prevention and Removal of Efflorescence

Prevention

  • An impregnating hydrophobic sealant can be applied to a surface to prevent the intrusion of water. It will also prevent water from traveling to the surface from within. In cold climates, this sealant can cause material to break during freeze/thaw cycles.
  • During home construction, bricks left out overnight should be kept on pallets and be covered. Moisture from damp soil and rain can be absorbed into the brick.
  • Install capillary breaks, including polyethelene sheeting between the soil and the building material, such as concrete.

Removal

  • Pressurized water can sometimes be used to remove or dissolve efflorescence.
  • An acid, such as diluted muriatic acid, can be used to dissolve efflorescence. Water should be applied first so that the acid does not discolor the brick. Following application, baking soda can be used to neutralize the acid and prevent any additional damage to the masonry. Muriatic acid is toxic, and contact with skin or eyes should be avoided.
  • A strong brush can be used to simply scrub the efflorescence off.
Note:  The use of water to remove efflorescence may result in the re-absorption of crystals into the host material, and they may later reappear as more efflorescence. It is advisable that if water is used in the removal process that the masonry is dried off very quickly.
In summary, efflorescence is a cosmetic issue, but it indicates a potential moisture problem. Inspectors should know the how capillary forces can cause structural damage to building materials and educate their clients about efflorescence and the potential problems it may cause.


From Efflorescence for Inspectors – InterNACHI http://www.nachi.org/efflorescence.htm#ixzz2zvIED6NQ

A firestop is a passive fire-protection method designed to diminish the opportunity for fire to spread through unprotected openings in a rated firewall. Such openings are found around the perimeter of pipes and wiring that penetrate firewalls.
Places where firestops are required:
Firestops must seal all unprotected openings in firewalls. In homes, firewalls are found in the following locations:
  • between the garage and the living space, including the overhead ceiling;
  • between the attic and the living space. Inspectors should be on the lookout for fireplace and wood stove flues that lack adequate fire-rated sheetrock or metal flashing firestopping, as in the photograph at right;
  • firewalls that separate condominium units are often penetrated by utilities that serve multiple units. These utilities are sometimes contained inside chases that should be sealed where they pass through the firewall between units. Firewalls between units must be continuous, all the way to the roof. Inspectors should check in attics of multi-family dwellings to make sure that the firewall has not been violated in the attic space.

schedule

Common Problems With Firestops
InterNACHI inspectors should call out any instances where firestops are missing, damaged, or otherwise inadequate. Brief explanations of firestop deficiencies commonly encountered by inspectors are listed below:
  • missing firestop:  Unsealed pipe penetrations will greatly reduce the ability for a firewall to contain a fire. This situation is more common in old buildings than in new buildings, due to changes in building code.
  • cable or pipe replacement:  Electricians and plumbers may partially remove a firestop in order to install new cables and plumbing. A firewall’s fire-resistance rating will be compromised if the opening created by this removal is not filled.
  • improper installation:  Firestops will be effective only if they are installed correctly. For instance, firestop mortars are sometimes smeared into place unevenly and lack the required thickness at certain points. Also, firestops that are installed only on one side of a penetration may not be sufficient to prevent the spread of fire through the opening.
Common Firestop Materials
  • firestop mortar:  Cements made from lightweight aggregates, such as vermiculite or perlite, can be used as firestopping. They are typically colored to distinguish them from other types of cement that lack firestopping characteristics. For example, firestopping mortar made by Nelson is colored red, and 3M Fire Barrier Mortar is colored bluish-gray.
  • intumescent:  Any substance that expands as a result of heat exposure is considered an intumescent. Intumscents used as firestops can be made from a variety of flame-retardant materials, such as graphite, hydrates, and sodium silicates. They are especially useful firestopping materials for electrical cables, which can completely melt or burn away in a fire. The expanding intumescent will partially or completely cover the exposed opening created by a melted wire.
  • firestop pillows:  These items contain various flame-retardant and intumescent substances, such as rockwool or graphite. They are filled loosely inside of a fiberglass fabric case that resembles a small pillow. Firestop pillows can be inserted into openings in firewalls and used in conjunction with other firestopping materials.
  • sheet metal
  • fire-rated sheetrock
In summary, firestops are designed to prevent the spread of fire through unprotected openings in rated firewalls. Inspectors should understand what they are and what purpose they serve.

From Firestops – Int’l Association of Certified Home Inspectors 

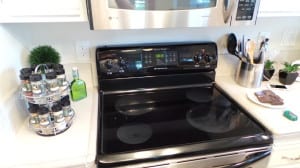
Anti-tip brackets are metal devices designed to prevent freestanding ranges from tipping. They are normally attached to a rear leg of the range or screwed into the wall behind the range, and are included in all installation kits. A unit that is not equipped with these devices may tip over if enough weight is applied to its open door, such as that from a large Thanksgiving turkey, or even a small child. A falling range can crush, scald, or burn anyone caught beneath.2014-04-14 03.16.06

Bracket Inspection

Inspectors can confirm the presence of anti-tip brackets through the following methods:

  • It may be possible to see a wall-mounted bracket by looking over the rear of the range. Floor-mounted brackets are often hidden, although in some models with removable drawers, such as 30-inch electric ranges made by General Electric, the drawers can be removed and a flashlight can be used to search for the bracket. Inspectors should beware that a visual confirmation does not guarantee that the bracket has been properly installed.
  • Inspectors can firmly grip the upper-rear section of the range and tip the unit. If equipped with an anti-tip bracket, the unit will not tip more than several inches before coming to a halt. The range should be turned off, and all items should be removed from the stovetop before this action can be performed. It is usually easier to detect a bracket by tipping the range than through a visual search. This test can be performed on all models and it can confirm the functionality of a bracket.

If no anti-tip bracket is detected, inspectors should recommend that one be installed.

Clients can contact the dealer or builder who installed their range and request that they install a bracket. For clients who wish to install a bracket themselves, the part can be purchased at most hardware stores or ordered from a manufacturer. General Electric will send their customers an anti-tip bracket for free.

schedule

According to the U.S. Consumer Product Safety Commission (CPSC), there were 143 incidents caused by range tip-overs from 1980 to 2006. Of the 33 incidents that resulted in death, most of those victims were children. A small child may stand on an open range door in order to see what is cooking on the stovetop and accidentally cause the entire unit to fall on top of him, along with whatever hot items may have been cooking on the stovetop. The elderly, too, may be injured while using the range for support while cleaning. InterNACHI inspectors who inspect ovens should never leave the oven door open while the oven is unattended.

In response to this danger, the American National Standards Institute (ANSI) and Underwriters Laboratories (UL) created standards in 1991 that require all ranges manufactured after that year to be capable of remaining stable while supporting 250 pounds of weight on their open doors. Manufacturers’ instructions, too, require that anti-tip brackets provided be installed. Despite these warnings, retailer Sears estimated in 1999 that a mere 5% of the gas and electric units they sold were ever equipped with anti-tip brackets. As a result of Sears’ failure to comply with safety regulations, they were sued and subsequently required to secure ranges in nearly 4 million homes, a measure that has been speculated to have cost Sears as much as $500 million.

In summary, ranges are susceptible to tipping if they are not equipped with anti-tip brackets. Inspectors should know how to confirm that these safety devices are present.

From Anti-Tip Brackets for Freestanding Ranges – InterNACHI http://www.nachi.org/anti-tip.htm#ixzz2zXnoPcpx