Waterproofing the basement is essential for any homeowner, as it helps prevent flooding, mold growth, and structural damage. A basic waterproofing system typically consists of several components, including a drainage system, sump pump, and interior or exterior waterproofing membranes.

The first step to waterproofing the basement is to create a drainage system. This system will collect water from outside the home and channel it away from the foundation, preventing it from seeping in and causing damage. Installing a perimeter and French drain can help direct water away from home.
Basement Waterproofing

Basement Waterproofing

The second step is to install a sump pump. A sump pump collects groundwater in a sump basin, then pumps it out of the basement and away from home. This helps to prevent groundwater from pooling around the foundation, which can lead to the foundation cracking or shifting.

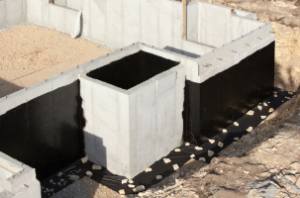
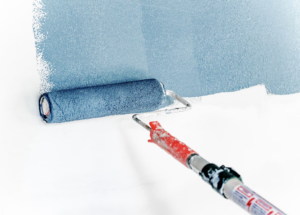
Finally, homeowners can apply interior or exterior waterproofing membranes to the basement walls. Internal membranes are applied directly to the basement walls and act as a barrier between the dampness of the basement and the living area. Exterior membranes are used outside the foundation and act as a barrier between the foundation and the surrounding soil.

By taking steps such as creating a drainage system, installing a sump pump, and applying interior or exterior waterproofing membranes, a homeowner can effectively waterproof their basement and protect it from flooding, mold growth, and structural damage. Taking the time to waterproof a basement can save a homeowner thousands of dollars in the long run, making it an essential step for any homeowner.

Home Repair Rip-Offs are becoming a severe problem in today’s world. Homeowners are at risk of being taken advantage of by unqualified and unscrupulous contractors who promise to fix their home repairs but either never finish the job or do a sub-par job leading to more problems and higher costs in the long run. A home inspection is a great way to ensure that you get the job done right the first time and save yourself the headache and money of being taken advantage of.

During a home inspection, a qualified inspector will come to your house and look at every aspect of the home and all its systems. They will check the roof, exterior walls, wiring, plumbing, and HVAC system. The inspector will look for any signs of damage or disrepair and ensure all systems are running correctly and safely. They will also check for any potential issues that could lead to costly repairs in the future.

Home Repair Rip-Offs

Home Repair Rip-Offs

Once the inspection is done, the inspector will provide a detailed report of their findings and any recommended repairs. This information can be used to either negotiate a better deal with the contractor or find another one who can do the job correctly. Additionally, the report can create a budget for the repairs and ensure no one is overcharged for the work.

In addition to the home inspection, it’s essential to research the contractor you’re hiring. Ask for references and check the Better Business Bureau to ensure they’re reputable. It’s also a good idea to get several quotes on the job before deciding.

Home Repair Rip-Offs can be a severe problem, but they don’t have to be. With the correct information and preparation, homeowners can protect themselves and ensure they get the best possible value for their money. A home inspection is a great way to make sure the job is done right the first time and save time and money in the long run.

Evaluating the Potential for Radon

Radon testing is essential in evaluating the potential for radon in a home or building. Radon is a naturally occurring radioactive gas found in soil and rocks. It is released into the air when these materials are disturbed or exposed to the elements. Radon is a serious health hazard and can cause lung cancer when inhaled in high concentrations. Radon testing is the only way to accurately measure the level of radon present in a building and help determine whether or not there is a risk of exposure.

Radon Testing

Radon Testing

Several different types of radon testing can be used to evaluate potential radon exposure. The most common type of test is a charcoal canister test, which typically takes three to seven days. During this test, a canister is placed in the basement or other house area and left in place for some time. At the end of the test, the canister is analyzed to measure the amount of radon present.

Another type of radon testing is the long-term test, which typically takes one to two months. This test uses a continuous monitoring device that records the radon levels throughout the test period. This test is essential for identifying the average amount of radon in a building over time.

When evaluating the radon potential, it is essential to understand the risks associated with these tests. All tests come with some degree of uncertainty and should be done by a qualified professional who can advise you on the best test for your situation. Additionally, it is essential to understand that the results of a test may be less than 100% accurate and may need to be verified with a follow-up test.

Radon testing is an integral part of evaluating potential radon exposure. It is essential to understand that there is a certain amount of uncertainty associated with testing and that the results should always be verified with a follow-up test. Additionally, it is essential to understand the risks associated with these tests and to ensure that they are done by a qualified professional. By understanding these issues, you can make an informed decision about radon testing and ensure that your home or building is safe from radon exposure.

What is a slab leak? A slab leak is a leak in the water pipes that run beneath the concrete slab foundation of a home. Various issues, including corrosion or damage from earthquakes or plumbing accidents, cause it. If left unchecked, a leak can cause severe damage to the structure and foundation of a home.

Slab Leak

Signs of a Slab Leak

Several signs can indicate a leak in the slab. Awareness of these signs is the best way to prevent damage to the home’s foundation. Here are the most common symptoms of a leak:

Wet Spots on Floors

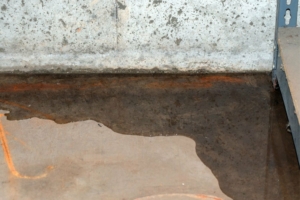
It could signify a leak if you notice any wet spots on your floors. The water seeping up from the slab can cause the floors to become damp or even wet.

Low Water Pressure

A decrease in water pressure can also signify a leak. This is because the water that is supposed to flow through the pipes is instead leaking out of the slab.

Increased Water Bill

If you notice an unusually high-water bill, it could signify a leak. This is because the water leaking from the slab will still be added to your water bill.

Cracked or Sinking Foundation

It could signify a leak if you notice cracks or sinking in your home’s foundation. This is because the leaking water can cause the slab to weaken, leading to cracks or settling.

Unusual Sounds from Pipes

It could signify a leak if you hear unusual sounds from your pipes, like gurgling or hissing. This is because the water leaking out of the slab can cause air bubbles and other strange noises.

Conclusion

A leak in the slab is a serious issue that can cause significant damage to the structure and foundation of a home. That’s why it’s essential to be aware of the signs of a leak in the slab to prevent severe damage. The most common symptoms of a slab leak include wet spots on floors, low water pressure, an increased water bill, cracked or sinking foundations, and unusual sounds from pipes. If you notice any of these signs, it’s essential to contact a plumber to investigate and repair the leak as soon as possible.