Encapsulating asbestos duct wrap is essential to protect yourself and your surroundings from harmful asbestos fibers. By following these 3 simple steps to safely encapsulate asbestos duct wrap, you can ensure a safe encapsulation procedure. This blog post will guide you through the process while providing tips to help you tackle this task effectively.
Step 1: Prepare the Work Area and Gather Supplies
Before beginning any asbestos encapsulation work, creating a safe environment is crucial. Follow these steps to prepare:
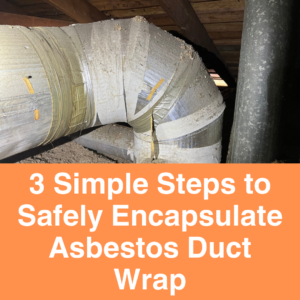
3 Simple Steps to Safely Encapsulate Asbestos Duct Wrap
Research and comply with local regulations
Ensure you are familiar with your local regulations regarding asbestos encapsulation and disposal. This knowledge will help you adhere to the requirements.
Assemble the necessary equipment
Obtain high-quality personal protective equipment (PPE) such as gloves, safety goggles, N95 respirator masks, and disposable coveralls. These are essential to protect against asbestos exposure.
Set up a contained work area
Isolate the work area by sealing off any ventilation systems or openings to prevent asbestos fibers from spreading to other areas of your home. Consider using plastic sheeting and duct tape to enclose the affected space.
Step 2: Encapsulate the Asbestos Duct Wrap
Now that your work area is adequately set up, let’s move on to encapsulating the asbestos duct wrap:
Thoroughly clean the duct surface
Use a HEPA filter-equipped vacuum cleaner to remove dirt or dust from the duct surface. Be cautious not to scratch or damage the asbestos-containing materials.
Apply encapsulation product
Select an asbestos encapsulation product recommended by professionals. These products are designed to seal the asbestos fibers, preventing their release into the surrounding air. Follow the manufacturer’s instructions to apply the encapsulant using a brush or sprayer.
Ensure even coverage
It’s essential to apply the encapsulation product evenly across the entire surface of the asbestos duct wrap. Make sure to cover all areas, including corners and edges. This will provide a complete seal and reduce the risk of fiber release.
Step 3: Clean up and Dispose of Materials Properly
To complete the encapsulation process and maintain safety, follow these final steps:
Clean up the work area
Use damp disposable rags or paper towels, and carefully clean any tools and equipment that come into contact with the asbestos-containing materials. Dispose of these materials safely according to local regulations.
Seal and dispose of waste
Double-bag all materials, including used rags, disposable coveralls, and cleaning supplies. Seal the bags tightly using duct tape or twist ties. Contact your local authorities or licensed professionals to understand the appropriate disposal methods and locations in your area.
Following these three simple steps, you can safely encapsulate asbestos duct wrap and minimize the risk of asbestos exposure. Conduct thorough research, wear appropriate PPE, and adhere to local regulations. Always prioritize safety when dealing with asbestos-related tasks and, if unsure, seek professional assistance to ensure proper encapsulation.