As the winter season draws to a close and the pleasant warmth of spring arrives, it’s essential to start preparing for the scorching summer days. One significant aspect of home maintenance that often goes overlooked is the regular inspection and servicing of your air conditioning system. Though it may seem unnecessary, getting your AC checked before summer can save you from discomfort, high energy bills, and unexpected breakdowns. This blog post will explore the top 3 reasons to get your home air conditioning system checked before summer.

Top 3 Reasons to Get Your Home Air Conditioning System Checked Before Summer

Top 3 Reasons to Get Your Home Air Conditioning System Checked Before Summer

Ensuring Optimum Performance

To provide a comfortable living environment during the sweltering heat, it is crucial to have an air conditioning system that performs at its peak efficiency. You can identify and address potential issues hindering your AC system’s performance by scheduling a professional inspection before summer begins. A routine maintenance check will involve cleaning or replacing air filters, examining and cleaning coils, calibrating thermostat settings, and checking refrigerant levels, among other tasks. This comprehensive inspection ensures your AC unit can deliver maximum cooling capacity, facilitating a comfortable indoor atmosphere throughout the summer.

Avoiding Costly Repairs

Regular maintenance and preventive checks are always more cost-effective than emergency repairs, especially air conditioning systems. Addressing minor issues early helps prevent them from escalating into more significant problems that could lead to a complete system shutdown or expensive repairs. During the inspection, an experienced technician can detect faulty components, loose electrical connections, or potential leaks and rectify them before they result in a complete system failure. Investing in a check-up can save you from unexpected repair costs and the inconvenience of spending days without an air conditioner during the year’s hottest days.

Energy Efficiency and Cost Savings

An improperly functioning AC system can significantly increase energy bills due to reduced energy efficiency. Having your air conditioning system checked and tuned before summer ensures that it operates optimally, using less energy to cool your home. Technicians can identify issues such as clogged filters, refrigerant leaks, or damaged ductwork that may affect the system’s performance. With a clean and well-maintained system, you can enjoy lower monthly energy bills while minimizing your carbon footprint.

Getting your home air conditioning system checked before summer’s arrival might seem unnecessary, but the long-term benefits outweigh any inconvenience. Scheduling a professional inspection enhances the performance and efficiency of your AC unit and helps you save money on costly repairs and reduce energy consumption. So, don’t wait until the heat of summer overwhelms you—take the time now to get your air conditioning system checked, ensuring a cool and comfortable home throughout the season.
Buying a new home is an exciting time in anyone’s life, but ensuring you’re making a wise investment is crucial. One of the essential steps in the home-buying process is a thorough home inspection. It allows you to identify any underlying issues within the property that may significantly impact its value and your future maintenance costs. This blog will outline some significant red flags to look out for during a home inspection.

Identifying Red Flags During a Home Inspection

Identifying Red Flags During a Home Inspection

Structural Issues

Pay close attention to any signs of structural problems during a home inspection. Cracks in the foundation, sagging or sloping floors, or uneven walls can indicate significant structural issues. Addressing these problems can be costly, potentially affecting the home’s stability and safety.

Water Damage

Water damage is a common concern in many homes. Inspectors may find stains on ceilings, walls, or floors, which could suggest recurring water issues. Musty odors or visible mold growth indicate a more severe problem. If left unaddressed, water damage can lead to structural issues, mold infestation, and costly repairs.

Electrical Problems

Outdated or faulty electrical systems can pose severe hazards. During the inspection, look for signs of unsafe wiring practices, such as knob-and-tube wiring or exposed wires. Additionally, check for faulty connections, flickering lights, or a lack of proper grounding. Electrical upgrades can be expensive, and an unsafe electrical system can compromise your well-being.

Plumbing Issues

Plumbing problems can cause significant headaches and expenses. Inspectors may identify low water pressure, leaky pipes, or insufficient drainage systems. These issues can result in water damage, mold growth, and additional expenses. Look for signs of leaks or water stains around plumbing fixtures.

Roofing Problems

A sturdy roof is vital to protect your home from the elements. Ask the inspector to check for any signs of damage, missing or deteriorated shingles, or leaks. A compromised roof can result in water intrusion, structural decay, and costly repairs. Remember, replacing a roof can be a substantial investment, so ensure it is in good condition before purchasing.

Pest Infestation

A home’s infestation by pests like termites, rodents, or other insects can adversely impact its structure and safety. Inspectors may notice signs of infestation, such as rodent droppings, chew marks, or termite damage. Addressing these issues promptly is critical to prevent further damage and potential health risks.

HVAC System Deficiencies

The heating, ventilation, and air conditioning (HVAC) system is crucial in maintaining a comfortable and healthy living environment. Inspectors will assess the HVAC system’s age, condition, and maintenance. An outdated or poorly maintained system can result in inefficient temperature control, higher energy bills, and the need for costly repairs or replacements.

Environmental Hazards

Finally, be aware of any potential environmental hazards in the home. Inspectors may identify the presence of asbestos, lead-based paint, radon gas, or poor indoor air quality. These hazards can pose significant health risks and require specialized treatment or remediation. Consider the potential costs and health implications before proceeding with the purchase.

A home inspection is a crucial step in the home-buying process, and identifying red flags early on can save you from potential headaches and financial burdens down the line. By being aware of common issues such as structural problems, water damage, electrical and plumbing deficiencies, roofing issues, pest infestations, HVAC system faults, and environmental hazards, you can make an informed decision when purchasing a home. Remember, involving a reputable home inspector is critical to thoroughly assessing your prospective property.

Encapsulating asbestos duct wrap is essential to protect yourself and your surroundings from harmful asbestos fibers. By following these 3 simple steps to safely encapsulate asbestos duct wrap, you can ensure a safe encapsulation procedure. This blog post will guide you through the process while providing tips to help you tackle this task effectively.

Step 1: Prepare the Work Area and Gather Supplies

Before beginning any asbestos encapsulation work, creating a safe environment is crucial. Follow these steps to prepare:

3 Simple Steps to Safely Encapsulate Asbestos Duct Wrap

3 Simple Steps to Safely Encapsulate Asbestos Duct Wrap

Research and comply with local regulations
Ensure you are familiar with your local regulations regarding asbestos encapsulation and disposal. This knowledge will help you adhere to the requirements.

Assemble the necessary equipment
Obtain high-quality personal protective equipment (PPE) such as gloves, safety goggles, N95 respirator masks, and disposable coveralls. These are essential to protect against asbestos exposure.

Set up a contained work area
Isolate the work area by sealing off any ventilation systems or openings to prevent asbestos fibers from spreading to other areas of your home. Consider using plastic sheeting and duct tape to enclose the affected space.

Step 2: Encapsulate the Asbestos Duct Wrap

Now that your work area is adequately set up, let’s move on to encapsulating the asbestos duct wrap:

Thoroughly clean the duct surface
Use a HEPA filter-equipped vacuum cleaner to remove dirt or dust from the duct surface. Be cautious not to scratch or damage the asbestos-containing materials.

Apply encapsulation product
Select an asbestos encapsulation product recommended by professionals. These products are designed to seal the asbestos fibers, preventing their release into the surrounding air. Follow the manufacturer’s instructions to apply the encapsulant using a brush or sprayer.

Ensure even coverage
It’s essential to apply the encapsulation product evenly across the entire surface of the asbestos duct wrap. Make sure to cover all areas, including corners and edges. This will provide a complete seal and reduce the risk of fiber release.

Step 3: Clean up and Dispose of Materials Properly

To complete the encapsulation process and maintain safety, follow these final steps:

Clean up the work area
Use damp disposable rags or paper towels, and carefully clean any tools and equipment that come into contact with the asbestos-containing materials. Dispose of these materials safely according to local regulations.

Seal and dispose of waste
Double-bag all materials, including used rags, disposable coveralls, and cleaning supplies. Seal the bags tightly using duct tape or twist ties. Contact your local authorities or licensed professionals to understand the appropriate disposal methods and locations in your area.

Following these three simple steps, you can safely encapsulate asbestos duct wrap and minimize the risk of asbestos exposure. Conduct thorough research, wear appropriate PPE, and adhere to local regulations. Always prioritize safety when dealing with asbestos-related tasks and, if unsure, seek professional assistance to ensure proper encapsulation.

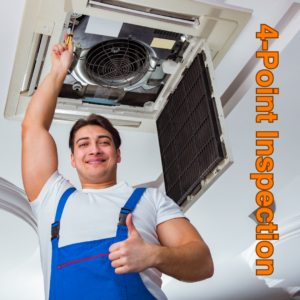
When it comes to insuring your property, insurance companies may require a 4-point inspection. This specialized inspection focuses on four critical components of a home – electrical, plumbing, HVAC, and roofing. In this blog post, we’ll explore everything you need to know about 4-Point Inspections for Insurance. The details of a 4-point inspection, why insurance companies request it, and its importance for homeowners. Let’s get started!

Everything You Need to Know About 4-Point Inspections for Insurance

Everything You Need to Know About 4-Point Inspections for Insurance

Electrical System

During a 4-point inspection, the electrical system is thoroughly examined to identify potential hazards or outdated components. The inspector will assess the electrical service panel, wiring, and other visible elements. They look for proper installation of faulty wiring, obsolete materials, or potential safety risks. By scrutinizing these aspects, insurance companies ensure that the property is not susceptible to electrical disasters like fire or electrical shock.

Plumbing System

The plumbing system inspection focuses on water supply lines, drain lines, and fixtures. Leaks, outdated plumbing materials, and signs of water damage are carefully examined. Through this inspection, insurance companies want to ensure that the property’s plumbing is in good working condition – no leaks, no outdated pipes, and no hidden issues that could lead to significant water damage.

HVAC System

The heating, ventilation, and air conditioning system (HVAC) inspection aims to evaluate these systems’ condition, age, and functionality. The inspector checks the heating and cooling units, ventilation, and ductwork for possible problems. Insurance companies are interested in determining if the HVAC system is running efficiently and poses no significant risks of malfunction, which could result in expensive repairs or replacement.

Roofing

A thorough examination of the roof is crucial during a 4-point inspection. The inspector inspects the roof’s age, condition, and overall integrity. Signs of damage, leaks, or wear and tear are noted. Insurance companies need this information to assess the risk of potential claims related to roof problems. An old or damaged roof can lead to considerable damage caused by storms or water penetration, making it a pivotal component to evaluate during the inspection.

Conclusion

A 4-point inspection is a specialized inspection demanded by insurance companies to assess the insurability of a property. By inspecting the electrical system, plumbing, HVAC, and roofing, insurers aim to identify potential risks and liabilities associated with these components. The results help them determine appropriate coverage and premiums for older homes or those with outdated systems. If you plan to insure your property, expect a 4-point inspection as part of the insurance process.

Remember, a properly conducted 4-point inspection ensures that your property is adequately protected and avoids potential issues in the future, giving you peace of mind.

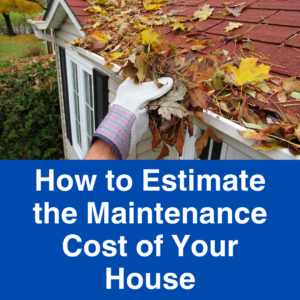
How to Estimate the Maintenance Cost of Your House. As a homeowner, one of the crucial elements to consider is budgeting for your home’s maintenance costs. Effectively estimating these expenses helps you plan your finances and ensures your house remains in good condition and retains its value. In this blog post, we’ll provide you with a systematic approach to estimating the maintenance cost of your house, helping you make informed decisions and avoid any unexpected financial surprises.

How to Estimate the Maintenance Cost of Your House

How to Estimate the Maintenance Cost of Your House

Conduct a Thorough Inspection

Before estimating maintenance costs, it’s essential to evaluate the current condition of your home. Conduct a comprehensive inspection, paying attention to critical areas such as the roofing, plumbing, electrical systems, HVAC, and structural elements. Identify any existing issues, deficiencies, or potential areas of concern that may require maintenance or repair.

Categorize and Prioritize Maintenance Tasks

After the initial inspection, categorize the maintenance tasks into routine, preventive, and significant repairs. Everyday tasks encompass regular upkeep, such as cleaning gutters or replacing furnace filters. Preventative maintenance includes activities that prevent potential issues, like servicing air conditioning units or sealing windows. Major repairs encompass more significant expenses, such as replacing the roof or repairing foundation cracks.

Research Average Costs

Gather information on average maintenance costs in your locality. Online resources, contractor estimates, and advice from experienced homeowners can provide valuable insights. Consider your house’s size, age, construction material, and unique features when comparing maintenance costs. Local factors like climate and regional pricing variations may also influence expenses. Aim for a realistic estimation that aligns with your property’s characteristics and preferences.

Create a Timeline and Budget

Once you understand the likely maintenance tasks and their respective costs, create a maintenance timeline. Determine the frequency at which routine tasks must be performed and any recommended schedules for preventive measures. Allocate appropriate budgets for each maintenance category based on your estimated costs. To avoid financial strain, prioritize tasks based on urgency and allocate funds accordingly.

Account for Inflation and Long-Term Planning

Remember that maintenance costs aren’t static and tend to increase over time due to inflation and your home’s natural wear and tear. When creating long-term financial plans, account for inflation by factoring in an annual increase. Additionally, establish an emergency fund for unexpected repairs or urgent maintenance needs that may arise during the ownership of your house.

Regularly Review and Adjust Estimates

Maintenance costs can vary depending on numerous factors, including changes in your lifestyle, home improvements, and technological advancements. Reviewing and adjusting your cost estimates annually or whenever significant changes occur will help ensure accurate budgeting and savings planning.

Estimating the maintenance cost of your house is a vital part of responsible homeownership. You can make informed financial decisions and avoid unwelcome surprises by conducting thorough inspections, categorizing tasks, researching average costs, creating budgets and timelines, accounting for inflation, and regularly reviewing estimates. Proactive planning and budgeting will help you maintain and enhance your home’s value while keeping it in excellent condition for years.