As the winter season draws to a close and the pleasant warmth of spring arrives, it’s essential to start preparing for the scorching summer days. One significant aspect of home maintenance that often goes overlooked is the regular inspection and servicing of your air conditioning system. Though it may seem unnecessary, getting your AC checked before summer can save you from discomfort, high energy bills, and unexpected breakdowns. This blog post will explore the top 3 reasons to get your home air conditioning system checked before summer.

Top 3 Reasons to Get Your Home Air Conditioning System Checked Before Summer

Top 3 Reasons to Get Your Home Air Conditioning System Checked Before Summer

Ensuring Optimum Performance

To provide a comfortable living environment during the sweltering heat, it is crucial to have an air conditioning system that performs at its peak efficiency. You can identify and address potential issues hindering your AC system’s performance by scheduling a professional inspection before summer begins. A routine maintenance check will involve cleaning or replacing air filters, examining and cleaning coils, calibrating thermostat settings, and checking refrigerant levels, among other tasks. This comprehensive inspection ensures your AC unit can deliver maximum cooling capacity, facilitating a comfortable indoor atmosphere throughout the summer.

Avoiding Costly Repairs

Regular maintenance and preventive checks are always more cost-effective than emergency repairs, especially air conditioning systems. Addressing minor issues early helps prevent them from escalating into more significant problems that could lead to a complete system shutdown or expensive repairs. During the inspection, an experienced technician can detect faulty components, loose electrical connections, or potential leaks and rectify them before they result in a complete system failure. Investing in a check-up can save you from unexpected repair costs and the inconvenience of spending days without an air conditioner during the year’s hottest days.

Energy Efficiency and Cost Savings

An improperly functioning AC system can significantly increase energy bills due to reduced energy efficiency. Having your air conditioning system checked and tuned before summer ensures that it operates optimally, using less energy to cool your home. Technicians can identify issues such as clogged filters, refrigerant leaks, or damaged ductwork that may affect the system’s performance. With a clean and well-maintained system, you can enjoy lower monthly energy bills while minimizing your carbon footprint.

Getting your home air conditioning system checked before summer’s arrival might seem unnecessary, but the long-term benefits outweigh any inconvenience. Scheduling a professional inspection enhances the performance and efficiency of your AC unit and helps you save money on costly repairs and reduce energy consumption. So, don’t wait until the heat of summer overwhelms you—take the time now to get your air conditioning system checked, ensuring a cool and comfortable home throughout the season.

Encapsulating asbestos duct wrap is essential to protect yourself and your surroundings from harmful asbestos fibers. By following these 3 simple steps to safely encapsulate asbestos duct wrap, you can ensure a safe encapsulation procedure. This blog post will guide you through the process while providing tips to help you tackle this task effectively.

Step 1: Prepare the Work Area and Gather Supplies

Before beginning any asbestos encapsulation work, creating a safe environment is crucial. Follow these steps to prepare:

3 Simple Steps to Safely Encapsulate Asbestos Duct Wrap

3 Simple Steps to Safely Encapsulate Asbestos Duct Wrap

Research and comply with local regulations
Ensure you are familiar with your local regulations regarding asbestos encapsulation and disposal. This knowledge will help you adhere to the requirements.

Assemble the necessary equipment
Obtain high-quality personal protective equipment (PPE) such as gloves, safety goggles, N95 respirator masks, and disposable coveralls. These are essential to protect against asbestos exposure.

Set up a contained work area
Isolate the work area by sealing off any ventilation systems or openings to prevent asbestos fibers from spreading to other areas of your home. Consider using plastic sheeting and duct tape to enclose the affected space.

Step 2: Encapsulate the Asbestos Duct Wrap

Now that your work area is adequately set up, let’s move on to encapsulating the asbestos duct wrap:

Thoroughly clean the duct surface
Use a HEPA filter-equipped vacuum cleaner to remove dirt or dust from the duct surface. Be cautious not to scratch or damage the asbestos-containing materials.

Apply encapsulation product
Select an asbestos encapsulation product recommended by professionals. These products are designed to seal the asbestos fibers, preventing their release into the surrounding air. Follow the manufacturer’s instructions to apply the encapsulant using a brush or sprayer.

Ensure even coverage
It’s essential to apply the encapsulation product evenly across the entire surface of the asbestos duct wrap. Make sure to cover all areas, including corners and edges. This will provide a complete seal and reduce the risk of fiber release.

Step 3: Clean up and Dispose of Materials Properly

To complete the encapsulation process and maintain safety, follow these final steps:

Clean up the work area
Use damp disposable rags or paper towels, and carefully clean any tools and equipment that come into contact with the asbestos-containing materials. Dispose of these materials safely according to local regulations.

Seal and dispose of waste
Double-bag all materials, including used rags, disposable coveralls, and cleaning supplies. Seal the bags tightly using duct tape or twist ties. Contact your local authorities or licensed professionals to understand the appropriate disposal methods and locations in your area.

Following these three simple steps, you can safely encapsulate asbestos duct wrap and minimize the risk of asbestos exposure. Conduct thorough research, wear appropriate PPE, and adhere to local regulations. Always prioritize safety when dealing with asbestos-related tasks and, if unsure, seek professional assistance to ensure proper encapsulation.

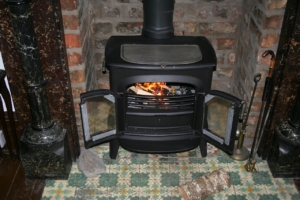
A wood-burning stove (also known as a wood stove) is a heating appliance made from iron or steel capable of burning wood fuel. Unlike a standard fireplace, a wood stove is typically contained entirely within the living space rather than inset in a wall.


Wood stoves come in many different sizes, each suited for another purpose.

Small stoves are suitable in single rooms, seasonal cottages, or tiny, energy-efficient homes. These models can also be used for zone heating in large houses where supplemental heating is needed.

Medium-size stoves are appropriate for tiny heating houses or mid-size homes that are intended to be energy-efficient and as inexpensive as possible.

Large stoves are used in larger or older homes that leak air and are located in colder climate zones.

To ensure the safe and efficient use of wood-burning stoves, inspectors can pass along the following tips to their clients:

Never:

  • Burn coal. Coal burns significantly hotter than wood, posing a fire hazard.
  • Burn materials that will emit toxic chemicals, such as wood that has been pressure-treated or painted, colored paper, gift wrapping, plastic, plywood, particleboard, or questionable wood from the furniture.
  • Burn wet wood. Generally speaking, it takes six months for cut, stored timber to dry out and be ready for use in wood-burning stoves.
  • Burn combustible liquids like kerosene, gasoline, alcohol, or lighter fluid.
  • Let small children play near a lit wood-burning stove. Unlike standard fireplaces, whose sides are primarily inaccessible, all sides of wood stoves are exposed and capable of burning flesh or clothing.
  • Let the fire burn while the fire screen or door is open.

Always:

  • use a grate to hold the logs so that they remain secured in the stove and the air can circulate adequately around them to keep the fire burning hot;
  • keep the damper open while the furnace is lit;
  • dispose of ashes outdoors in a water-filled, metal container;
  • check smoke alarms to make sure they are working correctly; and
  • periodically remove the stovepipe between the stove and the chimney so that it can be inspected for creosote. Homeowners may want to hire a professional to perform this service.

How to Reduce your Electricity Bills During Winter Months

If you are living in a cold area with severe winters, you must be annoyed with the high electricity bills incurred on account of keeping the home warm and comfortable. You get your heating unit serviced in time and placed heavy curtains in all the rooms. But still you find that your electricity bills remain steep during these 4-5 months. Here are some simple and very effective ways to keep your heating bill manageable during winter months.

Take advantage of whatever natural light you are getting

It is a fact that days are short and sunny weather conditions are rare during winter months. However, you must make the most of bright sunshine to keep your home warm as much as possible. Keep windows allowing natural sunlight inside open during day time and shut them after sunset. Trap the warmth of sun’s rays to increase the temperature inside the home.

Look at the insulation of your attic

When you send hot air inside your house, it tends to rise and go up. Much of the energy used to keep your home warm gets wasted as this hot air travels into the attic where it is of no use. Proper insulation of the attic is essential to make sure that it does not allow hot air to leak out. Make sure that you attic is properly sealed and padded up to prevent any leakage of hot air.

Adjustment of thermostat can help in saving electricity

You do not need heat when you are working or moving out of your home. Lower the thermostat to a range of 60-65 degrees for at least 8 hours in a day to help in lowering your electricity bills. Also, do not waste electricity on heating the rooms or areas that are rarely used during winter months. You can seal the guest room and the store room to stop heat from entering them. This will help you in controlling your electricity bills during winter season.

Use warm clothing and indulge in physical activities

You can make yourself warm without eating up a lot of electricity. You use warm and heavy clothing whenever you step out of your home but get rid of these clothes once you are back in your home. Keep wearing warm clothing items and indulge in exercises or workouts to naturally keep your body warm and comfortable. This way you will not remain dependent upon your heating unit to stay warm.

Perhaps the most frequent heating and cooling system maintenance problem home inspectors see is dirty furnace filters.  It’s easy to understand why people neglect this important maintenance task.  The system appears to work regardless of the condition of the filter.  So if it isn’t broken, why fix it?  Fix it because dirty filters cost you money by:

  • Making the system work longer to cool and heat your home,
  • Allowing dust and other contaminants into the ducts and furnace,
  • Contaminating parts and restricting air flow within the system,
  • Reducing the system’s service life.

In homes where the furnace is in the attic or crawlspace, the filter is often in the main return duct, which is usually located in a central hallway.  In homes where the furnace is in an accessible location such as the garage or a basement, the filter is usually located in the furnace cabinet.  If you have more than one system, you should have at least as many filters as you have systems.  Some homes have return ducts and filters in additional locations, such as the owner’s bedroom.

Here are some general rules about selecting and changing heating and cooling system filters.

  • Change disposable filters and clean washable filters at least once per month on the same day (so you won’t forget).
  • Locate and change every filter.
  • Use the correct size filters for your system (the size is printed on the filter).
  • Avoid using a filter with a high MERV rating (greater than about 8)  unless your system is designed to use a high MERV filter (most aren’t) because high MERV filters can restrict air flow.
  • Avoid installing washable filters when they are wet.
  • Look at your filter while the system is running; if it looks as if it is being pulled into the return duct or furnace then it is either too dirty or too restrictive or you may need more return ducts.
  • Buy filters in quantity so you will have them ready when you need them (they’re usually less expensive that way).

The Bottom Line

Changing your heating and cooling system filters when they don’t appear dirty may seem like a waste of money.  In fact, the opposite is true.  Changing the inexpensive disposable filters or cleaning a washable filter regularly will save you money and help the environment as well.

Information courtesy of the HomeOwnersNetwork.com