Are you in need of a handyman in California? It’s essential to understand the licensing requirements to avoid potential legal issues. In this blog post, we will provide vital information about the licensing regulations for handymen in California and help you navigate the process.

What is a Handyman?
Handyman Licensing Requirements in California: What You Need to Know

Handyman Licensing Requirements in California: What You Need to Know

Before delving into the licensing requirements, it’s essential to understand what a handyman does. A handyman is a versatile professional skilled in various tasks, from minor home repairs and maintenance to installations and small renovation projects. Their expertise extends to plumbing, electrical work, carpentry, painting, and more.

Licensing Requirements

In California, handymen fall under the jurisdiction of the Contractors State License Board (CSLB). While some states may not have licensing requirements for handymen, California has specific regulations in place. According to the CSLB, handymen must hold a valid contractor’s license if the total project labor and materials costs exceed $500. It is crucial to note that this threshold applies to the cumulative value of multiple projects within a single year.

Exemptions and Restrictions

There are exemptions and restrictions for minor work or specific tasks. For example, a handyman may not require a license if the project costs less than $500. However, a license becomes necessary if the project exceeds this amount, even if it’s a minor task.

It’s vital to remember that specific projects, such as electrical or plumbing work, require specialized licenses regardless of the cost. Hiring a licensed professional from the respective trade is paramount to ensure safety and legal compliance.

Benefits of Hiring a Licensed Handyman

Hiring a licensed handyman in California offers numerous advantages. Firstly, a licensed handyman has undergone the necessary training and proven their competence in their field. This helps protect you and your property from potential issues arising from subpar workmanship. Additionally, licensed handymen are more likely to have insurance coverage, which shields you from liability in case of accidents or property damage during the project.

Conclusion

If you need a handyman in California, remember that licensing requirements are crucial. Ensure that your handyman holds the necessary contractor’s license if the project’s costs exceed $500. This ensures compliance with the law and guarantees a knowledgeable and skilled professional for your home improvement needs.


How to Remove Old Caulk in 4 Easy Steps. Removing old caulk can be intimidating for many homeowners, especially those without remodeling experience. But it doesn’t have to be a stressful task. With a few tools, some patience, and a little know-how, you can easily remove an old caulk in just four easy steps.

How to Remove Old Caulk in 4 Easy Steps

How to Remove Old Caulk in 4 Easy Steps

The first step is to use a caulk removal tool or a putty knife to scrape off the old caulk. Start at one end of the caulk line and gently scrape away the material. Push the tool along the caulk bead, using a slight sawing motion, until all the caulk is removed. Make sure to check the corners and any hard-to-reach areas for any caulk residue.

The second step is to remove any remaining caulk residue with a wire brush or a cloth dampened with mineral spirits. Scrub away any remaining caulk and use an old toothbrush to clean corners and cracks. Once done, use a damp cloth to remove residual caulk or mineral spirits.

The third step is to vacuum the area to remove all caulk residue from the surface. Use an attachment with a soft brush to gently dislodge any pieces of caulk that may be sticking to the surface.

The fourth and final step is to prepare the surface for new caulk. Use a utility knife to scrape away any paint or debris in the area, and be sure to clear any dust and dirt. Wipe down the surface with a cloth dampened with mineral spirits and allow it to dry before you apply the new caulk.

Removing old caulk may seem intimidating, but with a few simple steps, it’s not as difficult as you may think. With the right tools, patience, and know-how, you can easily take on this home improvement project and give your home a much-needed facelift.

Is it worth replacing windows before selling a house?

When selling a home, the property’s value is one of the most important deciding factors. The condition of the windows is one of the first places potential buyers tend to look when assessing a property’s value. Replacing windows before selling a house can often be beneficial in increasing the overall value of the home.

Is it worth replacing windows before selling a house?

Is it worth replacing windows before selling a house?

The primary benefit of replacing windows before selling a house is the potential for increased value. New windows add aesthetic value to the home and improve energy efficiency, leading to long-term cost savings. When a potential buyer sees that a home has been well-maintained, they are more likely to make a higher offer, and the added value is reflected in the sale price.

In addition to these benefits, replacing windows before selling a house can help to speed up the process. New windows are often easier to install, meaning the process can be completed quickly and efficiently. The quicker installation time can tell that the home is ready to be listed sooner, increasing the chances of a successful sale.

The cost of replacing windows can vary depending on the size and type of windows and the company chosen for the job. Homeowners should shop for the best prices to get the most outstanding value.

Overall, replacing windows before selling a house can be a worthwhile investment. The potential for increased value and a quicker sale process make it a smart choice for any homeowner looking to maximize their property’s value.

Replacing windows before selling a house can be a good investment. It can increase the value of your home and help speed up the sale process. Shop around to get the best prices for the windows to get the most outstanding value for your money.

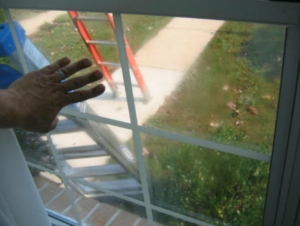
Double-paned windows are becoming increasingly popular for homeowners, offering thermal insulation and soundproofing. Unfortunately, condensation can develop between the panes, creating an unsightly appearance. How to fix double-paned window condensation requires a few simple steps.

First, locate the source of the condensation. Several possible causes include insufficient window sealing, cold weather, or high humidity. If the condensation is due to poor window sealing, the homeowner should contact a professional to seal the window properly. In cases of cold weather or high humidity, the homeowner can take steps to reduce condensation.

How to fix Double-Paned Window Condensation

How to fix Double-Paned Window Condensation

If the condensation is due to cold weather, the homeowner should ensure that no drafts are coming in from outside. This can be done by installing weather stripping and closing curtains and blinds to prevent cold air from entering the home. Additionally, the homeowner can use a dehumidifier to reduce the amount of moisture in the air.

In cases of high humidity, the homeowner should consult with a professional about installing a ventilation system. A ventilation system will help to remove excess moisture from the air, thereby reducing condensation in the window. Additionally, the homeowner should open curtains and blinds, allowing air circulation.

Finally, the homeowner should upgrade the window to a more efficient double-paned design. This will help to improve the thermal insulation, reduce noise, and reduce condensation. Newer models of window panes are designed to be more airtight and have better insulation.

These steps can help to reduce condensation in double-paned windows and give the homeowner a more visually appealing window. While condensation can be a problem, taking the proper steps can help to reduce or even eliminate it.

Home Repair Rip-Offs are becoming a severe problem in today’s world. Homeowners are at risk of being taken advantage of by unqualified and unscrupulous contractors who promise to fix their home repairs but either never finish the job or do a sub-par job leading to more problems and higher costs in the long run. A home inspection is a great way to ensure that you get the job done right the first time and save yourself the headache and money of being taken advantage of.

During a home inspection, a qualified inspector will come to your house and look at every aspect of the home and all its systems. They will check the roof, exterior walls, wiring, plumbing, and HVAC system. The inspector will look for any signs of damage or disrepair and ensure all systems are running correctly and safely. They will also check for any potential issues that could lead to costly repairs in the future.

Home Repair Rip-Offs

Home Repair Rip-Offs

Once the inspection is done, the inspector will provide a detailed report of their findings and any recommended repairs. This information can be used to either negotiate a better deal with the contractor or find another one who can do the job correctly. Additionally, the report can create a budget for the repairs and ensure no one is overcharged for the work.

In addition to the home inspection, it’s essential to research the contractor you’re hiring. Ask for references and check the Better Business Bureau to ensure they’re reputable. It’s also a good idea to get several quotes on the job before deciding.

Home Repair Rip-Offs can be a severe problem, but they don’t have to be. With the correct information and preparation, homeowners can protect themselves and ensure they get the best possible value for their money. A home inspection is a great way to make sure the job is done right the first time and save time and money in the long run.

Want to reface your kitchen cabinets? Smart decision. Kitchen refacing is more cost effective and takes less time than a full remodel. Here are options and costs.

Refacing your kitchen cabinets includes covering the exposed frames with a thin veneer of real wood or plastic laminate. Doors and drawer fronts are replaced to match or complement the new veneer. New hinges, knobs, pulls, and molding complete the transformation.

Read more: http://www.houselogic.com/home-advice/kitchens/refacing-kitchen-cabinets/#ixzz3YKYy0Avf

Follow us: @HouseLogic on Twitter | HouseLogic on Facebook

Source: Refacing Kitchen Cabinets | Kitchen Refacing | HouseLogic