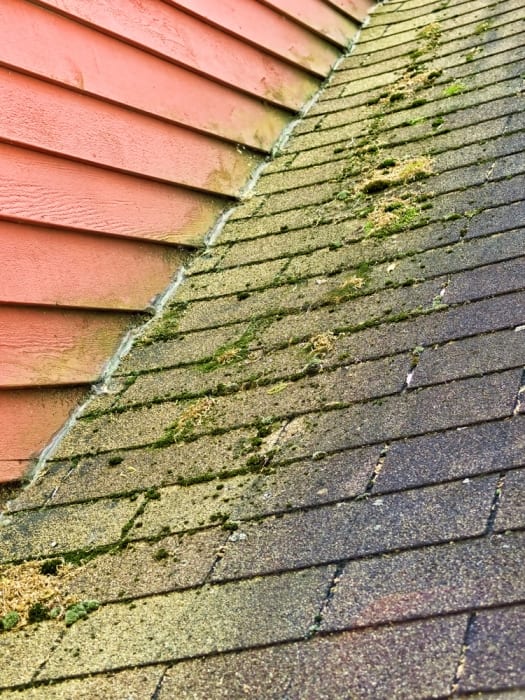
What Causes Sewer Blockages?

Some of the most common causes of sewer blockage are:

  • Build-up of grease, debris or foreign objects in the sewer lateral or city sewer main.
  • Partial or complete blockage caused by tree root intrusion into sewer pipes.
  • Sewer line collapse caused by old and deteriorated sewer pipes.
  • Debris entering the sewer system from illegal pipe connections.

Here are a few tips that will help protect against blockages:

Sewer mainline blockages are more common than most people think. Helping reduce blockages can reduce the cost to fix the problem, and reduce your overall maintenance expenditures.

Roots: Don’t plant trees or large shrubs near sewer lines. Roots grow toward breaks and cracks in the pipes in search of a source. If roots get inside the pipe, they form root balls that clog the line. Products are available that chemically treat roots which have found their way into pipes.

Roots in Sewer Line


Grease: Dispose of grease and fats with your trash – don’t put them down the drain! Grease collects and hardens inside the pipes and forms a plug.

Grease is Sewer Line

Deteriorated pipes: Some homes may have damaged or deteriorated pipes. Before considering upgrades or replacement, you may want to contact a plumber to discuss which options are appropriate for your situation.

Illegal plumbing connections: Don’t connect backyard drains, sump pumps and other drainage systems to the sanitary sewer. It’s illegal and debris and silt will clog your line. Consult a plumber to disconnect illegal connections.

Curious to know what causes sewer blockages? If you’re ready to schedule your sewer scope inspection in Orange County, simply contact Signature Home Inspection at (888) 860-2688 or submit the convenient form on our website.

Air conditioner is an electronic device with moving parts. It is prone to develop problems with constant use and passage of time. Regular servicing and maintenance makes sure that it keeps performing at optimal levels. However, there are some signs that tell your air conditioner requires immediate servicing.

Cooling efficiency has gone down

If you are not feeling comfortable even when your air conditioner is running at full capacity, you know that something is not right with the unit. Sweating or feeling uncomfortable when your A/C is running full blast is a sign that the unit has developed some snag. It is a sign that the A/C is not generating enough cold air to lower the temperature inside your home. You should clean the air filters of your A/C but that is the most you can do for troubleshooting. You need to call up experienced engineer to find if there are any issues with the electronic control panel or the cooling gas inside the air conditioner.

Your A/C is making strange sounds or generating smells

Smells and sounds are an indication that all is not well with your air conditioning unit. You should call up you’re A/C engineer to attend to your unit as soon as you sense some foul smell or hear strange noises made by the unit. Your A/C could be overheating, or some circuit might be burning in case of foul smell. If you hear weird sounds, they could be a result of loose fan belt or a malfunctioning fan motor. In fact, ignoring or overlooking sounds coming out of your air conditioning unit could prove dangerous as it can be a precursor to a big problem. Instead of waiting and then spending huge amount of money on repairs, it is a better idea to get your air conditioning unit serviced in time.

Very high electricity bills

Every air conditioning unit comes with a rating that determines how many units it will consume in a given time. If you find that your electricity bills have increased too much, it is a sign that your air conditioning unit is consuming a lot of electricity. Dirty air filters block normal air flow and your unit starts to consume more electricity than it should. However, if cleaning of air filters does not solve your problem, the malaise lies somewhere else and it can be detected only a trained and experienced engineer.

Stains on asphalt roofing shingles make a house look shabby, which detracts from its value. In some cases, stains are merely a cosmetic issue.  But sometimes they’re symptomatic of a problem that, if left unchecked, can lead to more serious damage and, eventually, roof failure. It’s not always hard to distinguish the causes of stains, nor, in most cases, to get rid of them and prevent the stains from recurring.

Common Causes of Staining

Dark stains on an asphalt roof could be caused by a number of conditions, including:

Eroded mineral surface. If the roof-covering material has been on the house for 15 years or so, it could be that the surface granules are wearing off the shingles and the asphalt base is starting to show through. On older roofs, you may additionally see cracked and/or shingles with curled edges. If you determine that age and wear are the causes of darkening, it may be time for a new roof.

Algae growth. More often than not, blue, green or black stains on an asphalt-shingle roof are caused by algae. Algae staining begins with small spots which, over time, can develop into streaks. Algae stains, which are often mistaken for mold or mildew, aren’t harmful to anything other than the appearance of asphalt shingles, but nobody likes the look.

Moss. Green, velvety masses of moss often grow on north-facing roof surfaces and on tree-shaded roofs. Unlike algae, moss left on roof surfaces can develop beyond an aesthetic problem. It can infiltrate the roof structure underneath the shingles and make their edges lift and curl, which can lead to cracking and blow-off during high winds and storms. Heavy moss growth can actually form dams that can cause water to back up under the shingles and damage the roof deck. It’s best to clean moss off a roof as soon as you notice it’s growing there.

Safety First

Both algae and moss can be easily removed from asphalt shingles with a 50/50 solution of chlorine bleach and water. Laundry-strength bleach is sufficient, or you can opt for any of a number of proprietary roof cleaners, some of which don’t contain bleach, lye, or other potentially harmful chemicals.

Since bleach and some cleaners can be harmful to plants and humans, it’s a good idea to take some precautions when working with them, including the following:

  • Wait for a calm, windless day to clean your roof.
  • Spray landscape plants near the house with water and cover them with tarps to protect them from chemical overspray and runoff.
  • Wear protective clothing, including long sleeves, pants and gloves, as well as goggles to protect your eyes, and shoes with high-traction soles.

Before climbing up to clean stains from your roof, be aware that about 30,000 people fall off ladders and roofs each year.  Consider using a safety harness, just as the pros are required to do, and follow the common-sense rules for properly positioning and using a ladder, which can be found in InterNACHI’s article on ladder safety.  Also, be sure to notify someone that you’ll be on your roof.  In case of an accident that incapacitates you, you’ll want someone to know where to look for you.

How to Clean Algae and Moss from a Roof

Apply the bleach solution with a garden sprayer. Let it stand on the surface for about 20 minutes, then rinse it off with spray from a garden hose. Don’t let the bleach solution stand on the roof for more than 30 minutes or so without rinsing. And don’t use a pressure washer, which can damage the shingles by removing their protective layer of asphalt granules.

If accumulations of algae or moss are heavy, at least some of it should wash off the roof surface right away with the stream from the hose. You can try brushing off algae and moss with a brush or broom with medium-stiff bristles, but don’t scrub too hard. You don’t want to separate the mineral granules from the shingles.

If chunks of algae or moss or heavy stains remain on the surface after rinsing, let the roof dry, then spray on the bleach solution again. Wait 30 minutes and rinse. Don’t worry if some staining remains after the second rinse. It should wash off over time with exposure to rain and sunlight.

How to Prevent Algae and Moss Stains from Recurring

Algae and moss tend to grow roof surfaces that are shaded and retain moisture. So, it’s a good idea to cut away tree branches that overhang the roof and block sunlight. Keep the roof surface clean by blowing off leaves and fallen branches during seasonal maintenance.

For long-term stain prevention, have zinc or copper strips installed under the cap shingles, leaving an inch or two of the surface exposed at roof peaks, along hips, and under the first course of shingles at the base of dormers. Copper and zinc are sacrificial metals that shed tiny bits of their surface with each rainfall. The metals coat the roof and inhibit organic growth for many years.

Following these maintenance tips can help homeowners enjoy an attractive roof.  They can also help extend the roof’s service life, which is important whether you plan to stay in your home or sell it in the future.

by Michael Chotiner of The Home Depot

Part of responsible homeownership includes, of course, regular home maintenance.  And there are some tasks that, if deferred, can lead to a home system that’s inefficient and overworked, which can result in problems and expenses.  One such task is changing the HVAC filter.  It’s simple and inexpensive, and taking care of it at least every three months can mean the difference between optimum comfort and avoidable repairs.wrapped-furnace-filter

What Can Go Wrong

Most homes have some sort of furnace or heat pump, and many of those homes (especially newer ones) have combined heating, ventilation and air-conditioning or HVAC systems.  Each type uses some type of air filter or screen to prevent larger airborne particles (up to 40 microns) from entering the system and clogging sensitive machinery.  A system that has a dirty filter can suffer from pressure drop, which can lead to reduced air flow, or “blow-out,” resulting in no air infiltration at all.  Any of these conditions can cause the system to work harder to keep the home warm or cool (depending on the season and the setting).  And any mechanical component that has to work harder to run efficiently puts undue stress on the whole system, which can lead to premature failure, resulting in repair or replacement.

Also, a dirty filter that’s exposed to condensation can become damp, which can lead to mold growth that can be spread throughout the home by the HVAC system.  This can lead to serious health consequences, not to mention a compromised unit that will likely require servicing and may require replacement, depending on the severity of the moisture problem.

Types of Filters

Most HVAC and furnace filters are disposable, made of biodegradable paper or similar media, and shaped in cells, screens or fins designed to trap as much airborne debris as possible.  Filters can typically be purchased in economical multi-packs, and there are many types that will fit different models of furnace/HVAC units.  It’s important to use the appropriate filter for your unit; using the wrong filter that doesn’t fit the unit properly can create the same types of problems as having a dirty filter.  Your HVAC installer can show you where the filter goes and how to remove the old one and install a new one.  Your unit may also have an affixed label with directions for easy filter replacement.

How Often?

Your HVAC or furnace technician should service your unit once a year.  Because a furnace/HVAC unit contains moving parts, it’s important that belts are not cracked and dry, ventilation ductwork is not gapped, cracked or rusted, and components, such as coils and fans, are clog-free and adequately lubricated for unimpeded operation.  This sort of evaluation is best left to the professional, unless the homeowner has had the appropriate training.

The filter of the unit, especially if it’s an HVAC unit that will tend to get nearly year-round use, should be changed by the homeowner at least every three months, but possibly more often.

Check your filter’s condition and change it once a month if:

  • You run your unit six months a year to year-round.
  • You have pets.  Pet dander can become airborne and circulate through the home’s ventilation system just as typical household dust does.
  • You have a large family.  More activity means more household dust, dirt and debris.
  • You smoke indoors.
  • You or someone in your household suffers from allergies or a respiratory condition.
  • You live in a particularly windy area or experience high winds for extended periods, especially if there are no nearby shrubs or trees to provide a natural windbreak.
  • You live in an area prone to or having recently experienced any wildfires.  Airborne ash outdoors will eventually find its way indoors.
  • You have a fireplace that you occasionally use.
  • You live on a working farm or ranch.  Dust and dirt that gets kicked up by outdoor work activity and/or large animals can be pulled into the home’s ventilation system, especially through open windows.
  • You have a large garden.  Depending on its size and how often you work it, tilling soil, planting, pulling weeds, using herbicides and pesticides, and even watering mean that dirt, chemicals and condensation can be pulled into your home’s ventilation system.
  • There is construction taking place around or near the home.  You may be installing a new roof or a pool, or perhaps a neighbor is building a home or addition.  Even if the activity is only temporary, dust and debris from worksites adjacent to or near the home can be sucked into the home’s ventilation system, and this increased activity can tax your HVAC system.

Change the filter immediately if:

  • The filter is damaged.  Whether it happened inside the packaging or while being installed, a damaged filter that has bent fins, collapsed cells or holes will not work as well as an undamaged filter, especially if it allows system air to bypass the filter at any point.
  • The filter is damp.  A filter affected by moisture intrusion, system condensation, or even high indoor humidity can quickly become moldy and spread airborne mold spores throughout the home via the ventilation system.
  • There is evidence of microbial growth or mold on the filter.  Mold spores already infiltrating the home via the HVAC system are not only bad for the unit itself, but they can pose a health hazard for the family, ranging from an irritated respiratory system to a serious allergic reaction.  The musty smell produced by a moldy HVAC filter is also unpleasant and may take a while to completely eradicate from inside the home.  If you discover that you have moldy air filter, it’s important to have the cause investigated further.  An InterNACHI inspector or HVAC technician can help determine the problem so that it doesn’t recur.

Tips on Changing the Filter

  • Turn off the unit before replacing the filter.
  • Use the right filter for your unit and make sure it’s not damaged out of the package.
  • Follow the directions for your unit to make sure you’re installing the filter properly.  For example, many filters use different colors for the front and back (or upstream and downstream flow) so that they’re not installed backwards.
  • Make sure there aren’t any gaps around the filter frame.  If this is the case, you may have the wrong size filter, or the filter itself may be defective or damaged.
  • Use a rag to clean up any residual dust before and after you replace the filter.
  • Securely replace any levers, gaskets and/or seals.
  • Turn the unit on and observe it while it’s operating to make sure the filter stays in place.
  • Note the date of filter replacement in a convenient location for the next time you inspect it.  A filter that becomes dirty enough to change within a short period of time may indicate a problem with the unit or ventilation system, so monitoring how often the filter requires changing is important information for your technician to have.

Call a technician for servicing if:

  • Your unit fails to turn back on.
  • The fan is slow or makes excessive noise, or the fins are bent.
  • The coils are excessively dusty or clogged.
  • You notice moisture intrusion from an unknown source anywhere in the system.
Homeowners who take care of the easy task of changing their HVAC filter can help prevent system downtime and avoidable expenses, as well as keep their families living and breathing comfortably.  Your Signature Home Inspection inspector can provide more useful tips and reminders during your annual home maintenance inspection.

Want to reface your kitchen cabinets? Smart decision. Kitchen refacing is more cost effective and takes less time than a full remodel. Here are options and costs.

Refacing your kitchen cabinets includes covering the exposed frames with a thin veneer of real wood or plastic laminate. Doors and drawer fronts are replaced to match or complement the new veneer. New hinges, knobs, pulls, and molding complete the transformation.

Read more: http://www.houselogic.com/home-advice/kitchens/refacing-kitchen-cabinets/#ixzz3YKYy0Avf

Follow us: @HouseLogic on Twitter | HouseLogic on Facebook

Source: Refacing Kitchen Cabinets | Kitchen Refacing | HouseLogic

Roofs play a key role in protecting building occupants and interiors from outside weather conditions, primarily moisture. The roof, insulation and ventilation must all work together to keep the building free of moisture. Roofs also provide protection from the sun. In fact, if designed correctly, roof overhangs can protect the building’s exterior walls from moisture and sun. The concerns regarding moisture, standing water, durability and appearance are different, reflected in the choices of roofing materials.

home_inspection_pricing

Maintaining Your Roof

Homeowner maintenance includes cleaning the leaves and debris from the roof’s valleys and gutters. Debris in the valleys can cause water to wick under the shingles and cause damage to the interior of the roof. Clogged rain gutters can cause water to flow back under the shingles on the eaves and cause damage, regardless of the roofing material. including composition shingle, wood shake, tile or metal. The best way to preserve your roof is to stay off it. Also, seasonal changes in the weather are usually the most destructive forces.

A leaky roof can damage ceilings, walls and furnishings. To protect buildings and their contents from water damage, roofers repair and install roofs made of tar or asphalt and gravel; rubber or thermoplastic; metal; or shingles made of asphalt, slate, fiberglass, wood, tile, or other material. Roofers also may waterproof foundation walls and floors.

There are two types of roofs: flat and pitched (sloped). Most commercial, industrial and apartment buildings have flat or slightly sloping roofs. Most houses have pitched roofs. Some roofers work on both types; others specialize. Most flat roofs are covered with several layers of materials. Roofers first put a layer of insulation on the roof deck. Over the insulation, they then spread a coat of molten bitumen, a tar-like substance. Next, they install partially overlapping layers of roofing felt, a fabric saturated in bitumen, over the surface. Roofers use a mop to spread hot bitumen over the surface and under the next layer. This seals the seams and makes the surface watertight. Roofers repeat these steps to build up the desired number of layers, called plies. The top layer either is glazed to make a smooth finish or has gravel embedded in the hot bitumen to create a rough surface. An increasing number of flat roofs are covered with a single-ply membrane of waterproof rubber or thermoplastic compounds. Roofers roll these sheets over the roof’s insulation and seal the seams. Adhesive mechanical fasteners, or stone ballast hold the sheets in place. The building must be of sufficient strength to hold the ballast.

Most residential roofs are covered with shingles. To apply shingles, roofers first lay, cut, and tack 3-foot strips of roofing felt lengthwise over the entire roof. Then, starting from the bottom edge, they staple or nail overlapping rows of shingles to the roof. Workers measure and cut the felt and shingles to fit intersecting roof surfaces and to fit around vent pipes and chimneys. Wherever two roof surfaces intersect, or where shingles reach a vent pipe or chimney, roofers cement or nail flashing strips of metal or shingle over the joints to make them watertight. Finally, roofers cover exposed nailheads with roofing cement or caulking to prevent water leakage. Roofers who use tile, metal shingles or shakes follow a similar process. Some roofers also water-proof and damp-proof masonry and concrete walls and floors. To prepare surfaces for waterproofing, they hammer and chisel away rough spots, or remove them with a rubbing brick, before applying a coat of liquid waterproofing compound. They also may paint or spray surfaces with a waterproofing material, or attach a waterproofing membrane to surfaces. When damp-proofing, they usually spray a bitumen-based coating on interior or exterior surfaces.

Sample-Home-Inspection-Report

A number of roofing materials are available…

Asphalt

Asphalt is the most commonly used roofing material. Asphalt products include shingles, roll-roofing, built-up roofing, and modified bitumen membranes. Asphalt shingles are typically the most common and economical choice for residential roofing. They come in a variety of colors, shapes and textures. There are four different types: strip, laminated, interlocking, and large individual shingles. Laminated shingles consist of more than one layer of tabs to provide extra thickness. Interlocking shingles are used to provide greater wind resistance. And large individual shingles generally come in rectangular and hexagonal shapes. Roll-roofing products are generally used in residential applications, mostly for underlayments and flashings. They come in four different types of material: smooth-surfaced, saturated felt, specialty-eaves flashings, and mineral-surfaced. Only mineral-surfaced is used alone as a primary roof covering for small buildings, such as sheds. Smooth-surfaced products are used primarily as flashing to seal the roof at intersections and protrusions, and for providing extra deck protection at the roof’s eaves and valleys. Saturated felt is used as an underlayment between the roof deck and the roofing material. Specialty-eaves flashings are typically used in climates where ice dams and water backups are common. Built-up roofing (or BUR) is the most popular choice of roofing used on commercial, industrial and institutional buildings. BUR is used on flat and low-sloped roofs and consists of multiple layers of bitumen and ply sheets. Components of a BUR system include the roof deck, a vapor retarder, insulation, membrane, and surfacing material. A modified bitumen-membrane assembly consists of continuous plies of saturated felts, coated felts, fabrics or mats between which alternate layers of bitumen are applied, either surfaced or unsurfaced. Factory surfacing, if applied, includes mineral granules, slag, aluminum or copper. The bitumen determines the membrane’s physical characteristics and provides primary waterproofing protection, while the reinforcement adds strength, puncture-resistance and overall system integrity.

Metal

Most metal roofing products consist of steel or aluminum, although some consist of copper and other metals. Steel is invariably galvanized by the application of a zinc or a zinc-aluminum coating, which greatly reduces the rate of corrosion. Metal roofing is available as traditional seam and batten, tiles, shingles and shakes. Products also come in a variety of styles and colors. Metal roofs with solid sheathing control noise from rain, hail and bad weather just as well as any other roofing material. Metal roofing can also help eliminate ice damming at the eaves. And in wildfire-prone areas, metal roofing helps protect buildings from fire, should burning embers land on the roof. Metal roofing costs more than asphalt, but it typically lasts two to three times longer than asphalt and wood shingles.

Wood

Wood shakes offer a natural look with a lot of character. Because of variations in color, width, thickness, and cut of the wood, no two shake roofs will ever look the same. Wood offers some energy benefits, too. It helps to insulate the attic, and it allows the house to breathe, circulating air through the small openings under the felt rows on which wooden shingles are laid. A wood shake roof, however, demands proper maintenance and repair, or it will not last as long as other products. Mold, rot and insects can become a problem. The life-cycle cost of a shake roof may be high, and old shakes can’t be recycled. Most wood shakes are unrated by fire safety codes. Many use wipe or spray-on fire retardants, which offer less protection and are only effective for a few years. Some pressure-treated shakes are impregnated with fire-retardant and meet national fire safety standards. Installing wood shakes is more complicated than roofing with composite shingles, and the quality of the finished roof depends on the experience of the contractor, as well as the caliber of the shakes used. The best shakes come from the heartwood of large, old cedar trees, which are difficult to find. Some contractors maintain that shakes made from the outer wood of smaller cedars, the usual source today, are less uniform, more subject to twisting and warping, and don’t last as long.

Concrete and Tile

Concrete tiles are made of extruded concrete that is colored. Traditional roofing tiles are made from clay. Concrete and clay tile roofing systems are durable, aesthetically appealing, and low in maintenance. They also provide energy savings and are environmentally friendly. Although material and installation costs are higher for concrete and clay tile roofs, when evaluated on a price-versus-performance basis, they may out-perform other roofing materials. Tile adorns the roofs of many historic buildings, as well as modern structures. In fact, because of its extreme durability, longevity and safety, roof tile is the most prevalent roofing material in the world. Tested over centuries, roof tile can successfully withstand the most extreme weather conditions including hail, high wind, earthquakes, scorching heat, and harsh freeze-thaw cycles. Concrete and clay roof tiles also have unconditional Class A fire ratings, which means that, when installed according to building code, roof tile is non-combustible and maintains that quality throughout its lifetime. In recent years, manufacturers have developed new water-shedding techniques and, for high-wind situations, new adhesives and mechanical fasteners. Because the ultimate longevity of a tile roof also depends on the quality of the sub-roof, roof tile manufacturers are also working to improve flashings and other aspects of the underlayment system. Under normal circumstances, properly installed tile roofs are virtually maintenance-free. Unlike other roofing materials, roof tiles actually become stronger over time. Because of roof tile’s superior quality and minimal maintenance requirements, most roof tile manufacturers offer warranties that range from 50 years to the lifetime of the structure.

Concrete and clay tile roofing systems are also energy-efficient, helping to maintain livable interior temperatures (in both cold and warm climates) at a lower cost than other roofing systems. Because of the thermal capacity of roof tiles and the ventilated air space that their placement on the roof surface creates, a tile roof can lower air-conditioning costs in hotter climates, and produce more constant temperatures in colder regions, which reduces potential ice accumulation. Tile roofing systems are made from naturally occurring materials and can be easily recycled into new tiles or other useful products. They are produced without the use of chemical preservatives, and do not deplete limited natural resources.

Single-Ply

Single-ply membranes are flexible sheets of compounded synthetic materials that are manufactured in a factory. There are three types of membranes: thermosets, thermoplastics, and modified bitumens. These materials provide strength, flexibility, and long-lasting durability. The advantages of pre-fabricated sheets are the consistency of the product quality, the versatility in their attachment methods, and, therefore, their broader applicability. They are inherently flexible, used in a variety of attachment systems, and compounded for long-lasting durability and watertight integrity for years of roof life. Thermoset membranes are compounded from rubber polymers. The most commonly used polymer is EPDM (often referred to as “rubber roofing”). Thermoset membranes make successful roofing materials because they can withstand the potentially damaging effects of sunlight and most common chemicals generally found on roofs. The easiest way to identify a thermoset membrane is by its seams, which require the use of adhesive, either liquid or tape, to form a watertight seal at the overlaps. Thermoplastic membranes are based on plastic polymers. The most common thermoplastic is PVC (polyvinyl chloride) which has been made flexible through the inclusion of certain ingredients called plasticizers. Thermoplastic membranes are identified by seams that are formed using either heat or chemical welding. These seams are as strong or stronger than the membrane itself. Most thermoplastic membranes are manufactured to include a reinforcement layer, usually polyester or fiberglass, which provides increased strength and dimensional stability. Modified bitumen membranes are hybrids that incorporate the high-tech formulation and pre-fabrication advantages of single-ply with some of the traditional installation techniques used in built-up roofing. These materials are factory-fabricated layers of asphalt, “modified” using a rubber or plastic ingredient for increased flexibility, and combined with reinforcement for added strength and stability. There are two primary modifiers used today: APP (atactic polypropylene) and SBS (styrene butadiene styrene). The type of modifier used may determine the method of sheet installation. Some are mopped down using hot asphalt, and some use torches to melt the asphalt so that it flows onto the substrate. The seams are sealed by the same technique.

Order Now

Are You at Risk?

If you aren’t sure whether your house is at risk from natural disasters, check with your local fire marshal, building official, city engineer, or planning and zoning administrator. They can tell you whether you are in a hazard area. Also, they usually can tell you how to protect yourself and your house and property from damage. It is never a bad idea to ask an InterNACHI inspector whether your roof is in need of repair during your next scheduled inspection. Protection can involve a variety of changes to your house and property which that can vary in complexity and cost. You may be able to make some types of changes yourself. But complicated or large-scale changes and those that affect the structure of your house or its electrical wiring and plumbing should be carried out only by a professional contractor licensed to work in your state, county or city. One example is fire protection, accomplished by replacing flammable roofing materials with fire-resistant materials. This is something that most homeowners would probably hire a contractor to do.

Replacing Your Roof

The age of your roof is usually the major factor in determining when to replace it. Most roofs last many years, if properly installed, and often can be repaired rather than replaced. An isolated leak usually can be repaired. The average life expectancy of a typical residential roof is 15 to 20 years. Water damage to a home’s interior or overhangs is commonly caused by leaks from a single weathered portion of the roof, poorly installed flashing, or from around chimneys and skylights. These problems do not necessarily mean you need a new roof.

Fire-Resistant Materials

Some roofing materials, including asphalt shingles, and especially wood shakes, are less resistant to fire than others. When wildfires and brush fires spread to houses, it is often because burning branches, leaves, and other debris buoyed by the heated air and carried by the wind fall onto roofs. If the roof of your house is covered with wood or asphalt shingles, you should consider replacing them with fire-resistant materials. You can replace your existing roofing materials with slate, terra-cotta or other types of tile, or standing-seam metal roofing. Replacing roofing materials is difficult and dangerous work. Unless you are skilled in roofing and have all the necessary tools and equipment, you will probably want to hire a roofing contractor to do the work. Also, a roofing contractor can advise you on the relative advantages and disadvantages of various fire-resistant roofing materials.

Hiring a Licensed Contractor

One of the best ways to select a roofing contractor is to ask friends and relatives for recommendations. You may also contact a professional roofers association for referrals. Professional associations have stringent guidelines for their members to follow. The roofers association in your area will provide you with a list of available contractors. Follow these guidelines when selecting a contractor:

  • get three references and review their past work;
  • get at least three bids;
  • get a written contract, and don’t sign anything until you completely understand the terms;
  • pay 10% down or $1,000 whichever is less;
  • don’t let payments get ahead of the work;
  • don’t pay cash;
  • don’t make final payment until you’re satisfied with the job; and
  • don’t rush into repairs or be pressured into making an immediate decision.

You’ve Chosen the Contractor… What About the Contract?

Make sure everything is in writing. The contract is one of the best ways to prevent problems before you begin. The contract protects you and the contractor by including everything you have both agreed upon. Get all promises in writing and spell out exactly what the contractor will and will not do.

…and Permits?

Your contract should call for all work to be performed in accordance with all applicable building codes. The building codes set minimum safety standards for construction. Generally, a building permit is required whenever structural work is involved. The contractor should obtain all necessary building permits. If this is not specified in the contract, you may be held legally responsible for failure to obtain the required permits. The building department will inspect your roof when the project has reached a certain stage, and again when the roof is completed.

…and Insurance?

Make sure the contractor carries workers’ compensation insurance and general liability insurance in case of accidents on the job. Ask to have copies of these policies for your job file. You should protect yourself from mechanics’ liens against your home in the event the contractor does not pay subcontractors or material suppliers. You may be able to protect yourself by having a “release of lien” clause in your contract. A release of lien clause requires the contractor, subcontractors and suppliers to furnish a “certificate of waiver of lien.” If you are financing your project, the bank or lending institution may require that the contractor, subcontractors and suppliers verify that they have been paid before releasing funds for subsequent phases of the project.

Keep these points in mind if you plan to have your existing roofing materials replaced:

  • Tile, metal, and slate are more expensive roofing materials, but if you need to replace your roofing anyway, it may be worthwhile to pay a little more for the added protection these materials provide.
  • Slate and tile can be much heavier than asphalt shingles or wood shingles. If you are considering switching to one of these heavier coverings, your roofing contractor should determine whether the framing of your roof is strong enough to support them.
  • If you live in an area where snow loads are a problem, consider switching to a modern standing-seam metal roof, which will usually shed snow efficiently.

Article information by Nachi.org

Signature Home Inspection is a Certified Home Inspection service located in California serving Orange County, San Diego County, Los Angeles County, Riverside County, Santa Clara County, San Mateo County, San Francisco County, Contra Costa County, and San Bernardino County California.

www.signaturemore.com                                               888-860-2688
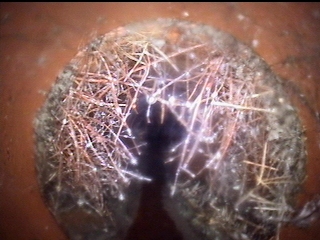
A building’s central air-conditioning system must be periodically inspected and maintained in order to function properly. While an annual inspection performed by a trained professional is recommended, homeowners can do a lot of the work themselves by following the tips offered in this guide.

Clean the Exterior Condenser Unit and Components

The exterior condenser unit is the large box located on the side of the building that is designed to push heat from the inside of the building to the outdoors.

Air conditioner

Air conditioner

Inside of the box are coils of pipe that are surrounded by thousands of thin metal “fins” that allow the coils more surface area to exchange heat. Follow these tips when cleaning the exterior condenser unit and its inner components — after turning off power to the unit!

  • Remove any leaves, spider webs and other debris from the unit’s exterior. Trim foliage back several feet from the unit to ensure proper air flow.
  • Remove the cover grille to clean any debris from the unit’s interior. A garden hose can be helpful for this task.
  • Straighten any bent fins with a tool called a fin comb.
  • Add lubricating oil to the motor. Check your owner’s manual for specific instructions.
  • Clean the evaporator coil and condenser coil at least once a year.  When they collect dirt, they may not function properly.

Inspect the Condensate Drain Line

Condensate drain lines collect condensed water and drain it away from the unit.  They are located on the side of the inside fan unit. Sometimes there are two drain lines—a primary drain line that’s built into the unit, and a secondary drain line that can drain if the first line becomes blocked. Homeowners can inspect the drain line by using the following tips, which take very little time and require no specialized tools:

  • Inspect the drain line for obstructions, such as algae and debris. If the line becomes blocked, water will back up into the drain pan and overflow, potentially causing a safety hazard or water damage to your home.
  • Make sure the hoses are secured and fit properly.

Clean the Air Filter

Air filters remove pollen, dust and other particles that would otherwise circulate indoors. Most filters are typically rectangular in shape and about 20 inches by 16 inches, and about 1 inch thick. They slide into the main ductwork near the inside fan unit. The filter should be periodically washed or replaced, depending on the manufacturer’s instructions. A dirty air filter will not only degrade indoor air quality, but it will also strain the motor to work harder to move air through it, increasing energy costs and reducing energy efficiency. The filter should be replaced monthly during heavy use during the cooling seasons. You may need to change the filter more often if the air conditioner is in constant use, if building occupants have respiratory problems,if  you have pets with fur, or if dusty conditions are present.

Cover the Exterior Unit

When the cooling season is over, you should cover the exterior condenser unit in preparation for winter. If it isn’t being used, why expose it to the elements? This measure will prevent ice, leaves and dirt from entering the unit, which can harm components and require additional maintenance in the spring. A cover can be purchased, or you can make one yourself by taping together plastic trash bags. Be sure to turn the unit off before covering it.

Close the Air-Distribution Registers

Air-distribution registers are duct openings in ceilings, walls and floors where cold air enters the room. They should be closed after the cooling season ends in order to keep warm air from back-flowing out of the room during the warming season. Pests and dust will also be unable to enter the ducts during the winter if the registers are closed. These vents typically can be opened or closed with an adjacent lever or wheel.  Remember to open the registers in the spring before the cooling season starts.  Also, make sure they are not blocked by drapes, carpeting or furniture.

In addition, homeowners should practice the following strategies in order to keep their central air conditioning systems running properly:

  • Have the air-conditioning system inspected by a professional each year before the start of the cooling season.
  • Reduce stress on the air conditioning system by enhancing your home’s energy efficiency. Switch from incandescent lights to compact fluorescents, for instance, which produce less heat.

In summary, any homeowner can perform periodic inspections and maintenance to their home’s central air-conditioning system.

Article information by Nachi.org

Signature Home Inspection is a Certified Home Inspection service located in California serving Orange County, San Diego County, Los Angeles County, Riverside County, Santa Clara County, San Mateo County, San Francisco County, Contra Costa County, and San Bernardino County California.

www.signaturemore.com                                               888-860-2688
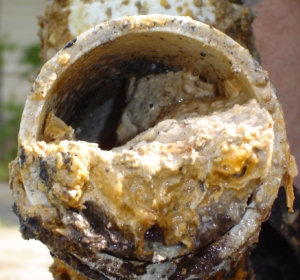
Hose Bib Maintenance

A hose bib (exterior faucet) is a threaded faucet also known as a wall hydrant. An example of a hose bib would be the standard exterior faucet of a residence. In colder climates the exterior hose bib will be mounted on an interior wall to prevent freezing.
There are two basic types of hose bibs that are used for exterior use. One is a standard hose bib. With this hose bib the water line extends all the way through the exterior wall and hose bib threads onto the pipe itself. The other is a frost proof hose bib. This hose bib has a long stem and it extends well into the heated space. These come in standard sizes of 8”, 10”, 12”, 14” and 18”. All lengths may not always available at all locations where you shop.
The frost proof will also have an anti-siphon device. An anti-siphon device will not allow water to siphon or to be drawn back into the potable water. The Standard hose bibs can be adapted by adding an anti-siphon device. You can pick up one of these devices at your local hardware store or at super store like Home Depot, Lowes, or Menards. They simply screw on. Once you screw this device on there is a nut that you can tighten down until it twists off.  It should not be able to be removed.
In colder climates or climates the reach below freezing temperatures there are a few other points to look at to keep your water lines from freezing. Make sure that you remove hoses from the hose bibs as fall arrives. Hose bibs will hold water and can cause the pies to burst in certain situations. On standard hose bibs (and possibly on frost free) there should be a stop valve on the inside of the home to shut the water off. Once the water is off make sure that the lines are drained to prevent freezing.
www.signaturemore.com